Closing and purging a range of purchase orders
Adapted from the Leahy Consulting white paper "How do I close a range of Macola® purchase orders and purge them to the history file?", updated September 2025.
Macola® Progression, ES and 10 can close old purchase orders in bulk, so nobody has to work through them one at a time. Once the orders are closed, you can purge them to the history file. If your menu has no screen for closing a range of orders, your software predates the feature and needs an upgrade.
Why old orders need closing
On-order quantities and scheduled receipt dates stay accurate only if someone closes the orders that will never be filled. Order 1,000 units, take delivery of 990, and the last 10 are almost certainly never coming. Macola® goes on reporting 10 units on order until the order status changes.
What the status codes mean
Printing a purchase order sets its status to P (printed). Once the order has been received and invoiced, the status should become C (closed) or H (history).
The difference between those two is where most people go wrong:
| Status | Hides the remaining quantity on the on-order and MRP reports | Corrects the on-order quantity in the item/location file |
|---|---|---|
| C — closed | No | No |
| H — history | Yes | Only after you run Reset On-Order Quantities |
Take that order with 10 units still outstanding. Setting it to C and running Reset On-Order Quantities leaves the 10 units on order. Only H, followed by Reset On-Order Quantities, clears them.
Status H does not move the order anywhere
Changing the status to H does not transfer the order to the history file. It stays in the file of active purchase orders until you purge it, which is step 2.
Step 1: Close a range of orders
Macola® ES and 10
- Open the PO & RFQ menu.
-
Under Process, click Close range of POs.
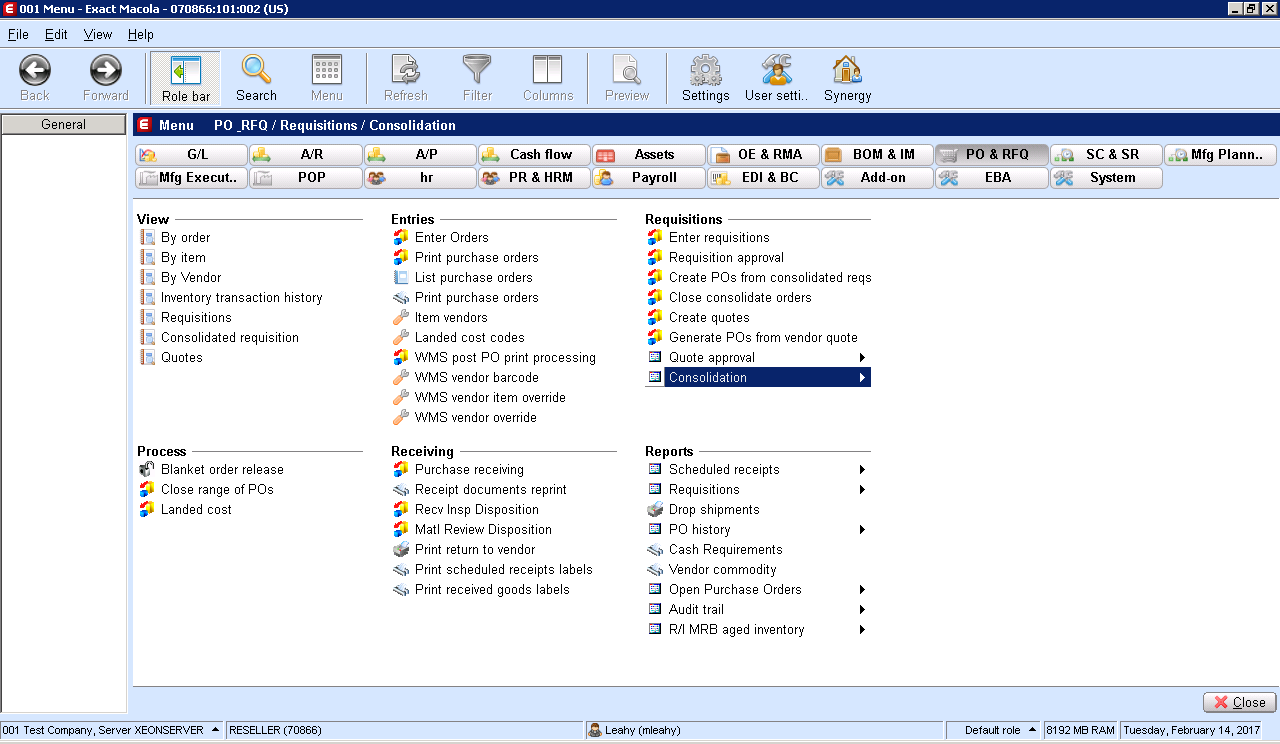
Close range of POs sits in the Process column of the PO & RFQ menu. -
Key in your selection criteria and press Enter. Set Status to H=History.
- Double-click each order you want to close, or click Select All. The Sel column changes from N to Y for the orders you picked.
-
Press Esc when you have finished selecting. Macola® asks you to confirm before it processes the orders.
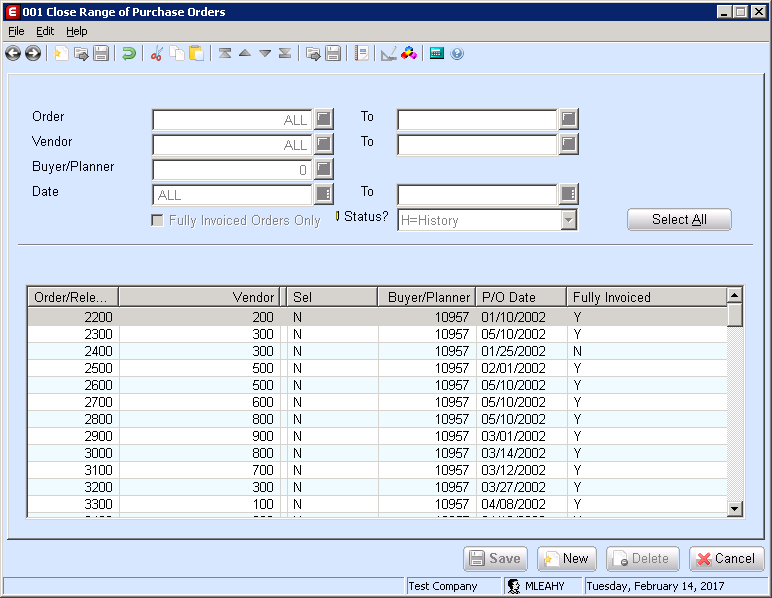
Selection criteria at the top, matching orders below. Status is set to H=History. -
Run Reset On-Order to correct the on-order quantities.
Select All only takes the 50 orders on screen
The program works 50 orders at a time. Select All picks up the 50 rows currently displayed, not everything that matched your criteria. Clearing a few thousand orders this way takes patience. Leahy Consulting also offers a fee-based service that does the same job in a few minutes with a SQL script — call (513) 723-8094.
Macola® Progression
- Go to Purchase Order → Trx → Purchase Order Entry.
-
Click Close Range Of PO's.
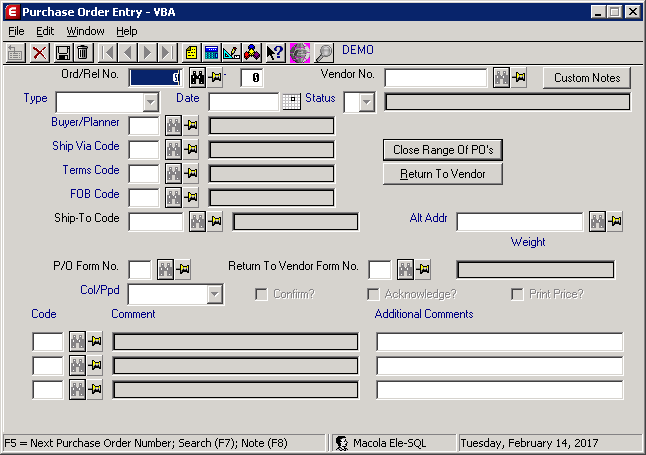
The Close Range Of PO's button on the Purchase Order Entry screen. -
Key in your selection criteria and press Enter. Set Status Flag to H=History.
- Double-click each order you want to close, or click Select All.
-
Press Esc when you have finished selecting, then confirm.
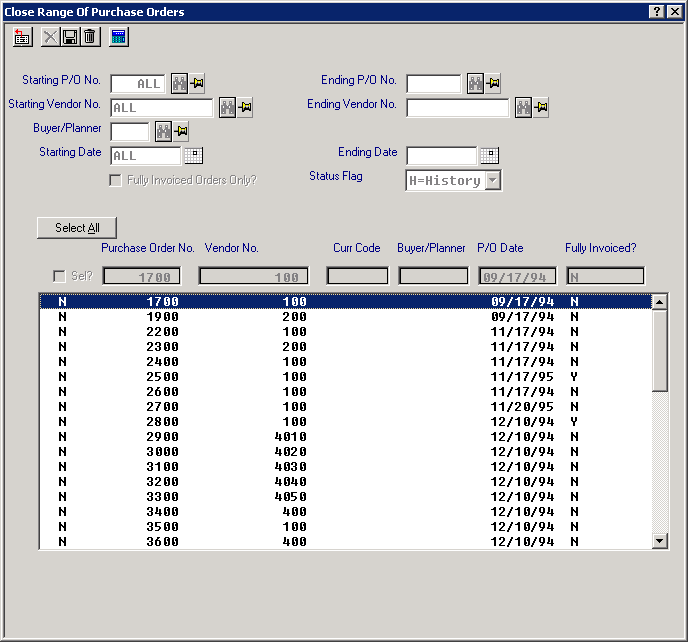
The Progression version of the same screen, with the Status Flag set to H=History. -
Run Reset On-Order to correct the on-order quantities.
Step 2: Purge closed orders to the history file
Closed orders still sit in the active files. Orders that are years old slow processing down and nobody is reading them, so at some point they should move to the P/O history files.
Purged orders disappear from the P/O View screens
Once an order is in the history files, the P/O View screens no longer show it.
Macola® ES and 10
- Open the System menu.
- Go to Utilities → Distribution → Purchase Order and click Purge Closed POs.
-
Choose the date range of orders to purge. Press F1 for the on-line documentation.
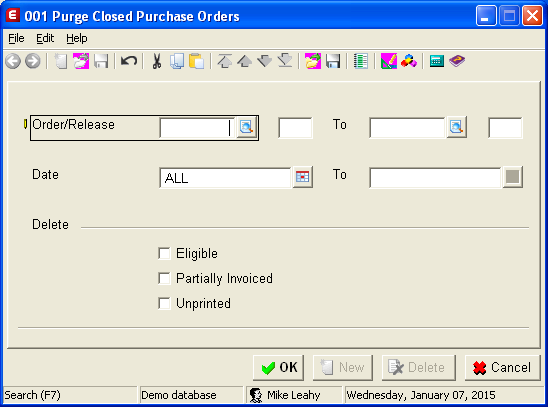
Purge Closed Purchase Orders in Macola® ES, filtered by order range and date.
Macola® Progression
- Open the Purchase Order menu.
-
Go to Processes and click Purge Closed Orders. Press Ctrl-F1 for the on-line documentation.
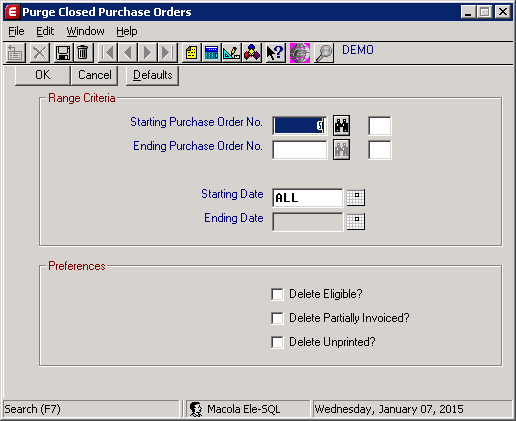
The Progression version, with range criteria and the three delete preferences.
Tip
Next step. Purchase orders are one file among many. If years of history have built up across the database, Pulse Archive moves old data to an archive database on a retention schedule you set, and the Archive Report shows you where the volume actually is.
Support & contact
Our team is glad to help with anything from a quick question to a full implementation.
- PULSE software support — (513) 723-8095 · [email protected]
- Sales & product questions — (513) 723-8091 · [email protected]
- Consulting & Macola services — (513) 723-8094 · [email protected]