Sales Forecast Import/Export utility
Adapted from the Leahy Consulting user guide "Macola® Sales Forecast Import/Export Utility for MRP or Master Scheduling — installation and operating instructions", October 2023.
If you run Macola® Master Scheduling or MRP, you have to create a sales forecast for every item you sell — and then key it into Macola® and maintain it there. This Excel-based utility takes both halves of that off your hands: it imports your Macola® sales history into Excel, and it exports your finished forecast back into the Macola® forecast file.
We built it originally for ForecastPro customers, to replace a module in Macola® that does not meet everyone's needs, and then streamlined it for anyone maintaining a Master Scheduling or MRP forecast. ForecastPro is an excellent and cost-effective forecasting tool, but the utility saves the same hours whether or not you use it.
What it does
- Imports your Macola® historical sales into Excel. From there, ForecastPro can read the data and generate a forecast — or you can write your own formulas against the history.
- Exports the finished forecast into the Macola® Master Scheduling
MSFRCFILfile or the MRP sales forecastMRORDFILfile, replacing or appending to an existing forecast, or creating a new one.
It is an Excel workbook with Visual Basic behind it, so there is no new software to learn, and no ongoing maintenance cost — the price includes unlimited phone support.
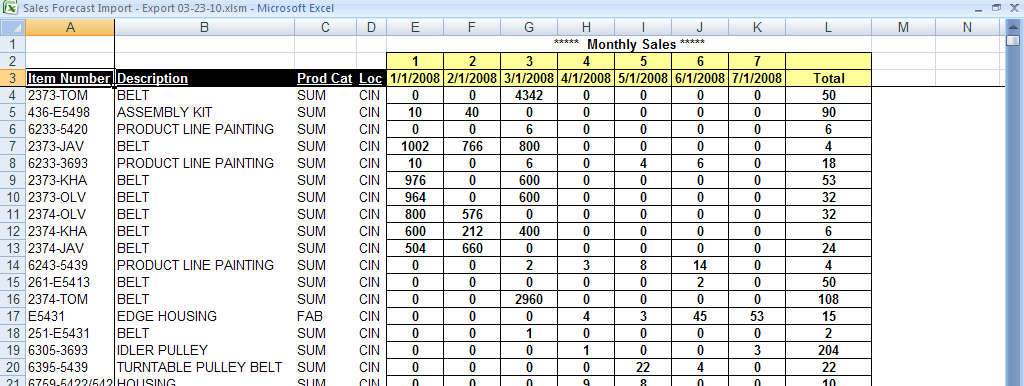
Step 1: Import your Macola® sales history into Excel
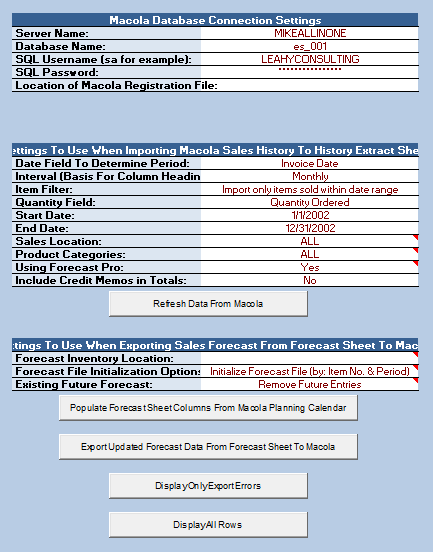
Open the workbook and go to the Setup tab. Set Start date and End date to the range of sales history you want. You can import from one location or all locations, in weekly or monthly increments.
The example in the guide extracts sales for 1 January 2008 to 31 July 2008, in
monthly increments, based on invoice date and quantity shipped, for the CIN
location only.
Click Refresh Data From Macola to start the import.
Step 2: If you use ForecastPro
Go to the Data From Macola tab and review the historical data before exporting it. Then follow your ForecastPro instructions for importing that history.
Step 3: If you do not use ForecastPro
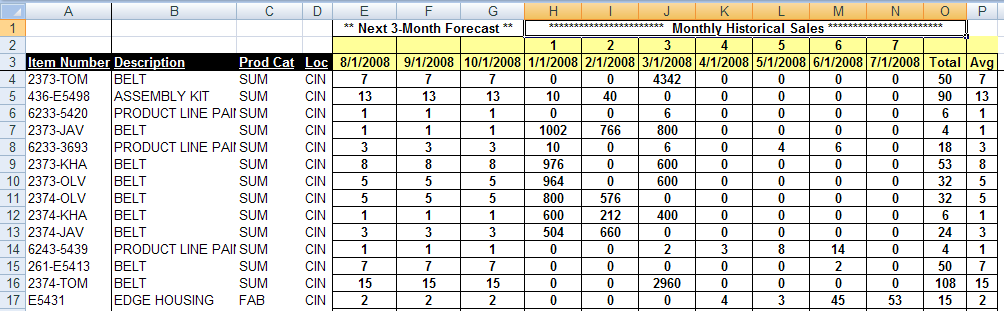
Go to the Macola Sales History Extract tab and add your own formulas to build the forecast.
The worked example in the guide adds a seven-month average and uses it to project a three-month forecast.
Step 4: Prepare the forecast for export
Go to the Data From ForecastPro tab and copy your new forecast into that worksheet — whether ForecastPro produced it or you wrote it by hand in step 3.
Step 5: Export the forecast into Macola®
Go back to the Setup tab and click Import ForecastPro Data into Macola. The program offers options for updating a single location and for how existing forecasts are overridden.
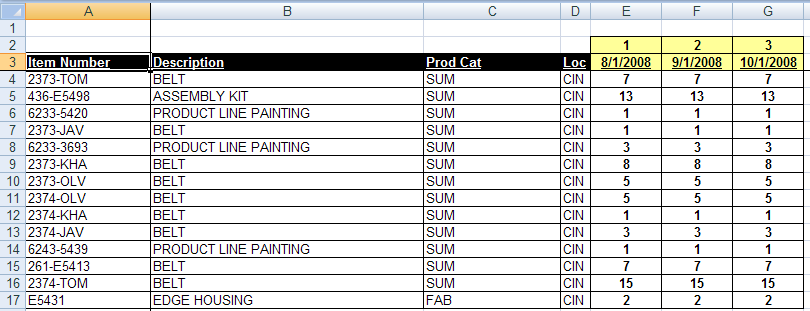
The export replaces the existing forecast for those item numbers
Whatever forecast Macola® currently holds for the item numbers in your worksheet is replaced. Decide before you run it whether you meant to replace the whole forecast or only part of it — the options on the Setup tab are where that choice is made.
What to do next
The forecast feeds MRP. How Pulse Dashboard's MRP engine reads a Macola® forecast is covered in MRP Engine → Settings → Forecast → Macola forecast.
Support & contact
Our team is glad to help with anything from a quick question to a full implementation.
- PULSE software support — (513) 723-8095 · [email protected]
- Sales & product questions — (513) 723-8091 · [email protected]
- Consulting & Macola services — (513) 723-8094 · [email protected]